
Recipe 20 : Bucket Mold Making for Silicone Prosthetics
- Koji Ohmura
- Jan 20
- 5 min read
Updated: Mar 13
What is a "Bucket Mold"? In Recipe 4, I made a 2-piece mold which I called a "Waffle Maker Mold." In this recipe, I am showing another way of making a 2-piece mold. It is often called a bucket mold. When you look at it from the top, it looks like 2 buckets sitting together.

Bucket molds can be very useful when you make a big sculpture on a 3-dimensional positive mold. Especially, you will need a bucket mold for a full face sculpture, forehead, full neck, etc.

Materials you need...
Positive Mold & Prosthetic Sculpture (I am using a hybrid unicorn horn I made on this video.)
Krylon Crystal Clear
Lacquer Thinner
Q-tip
Round Nose Router Bit (Keys)
Chavant Sculptex (Kleen Clay)
Sculpting Tools
Power Drill
Pasta Maker
Krylon Dulling Spray
Smooth On Sonite Wax
WED Clay
Vaseline
Ultracal 30
Burlap
Water
Gloves
Mixing Bowl
Rasp
99% Alcohol
Chip Brush
Mold Clamp


Material links are here.
Lesson Video
Mold Prep
Crystal Clear - First, you will need to seal your prosthetic sculpture. One layer of Krylon Crystal Clear is enough for now. It is just a protection at this moment.
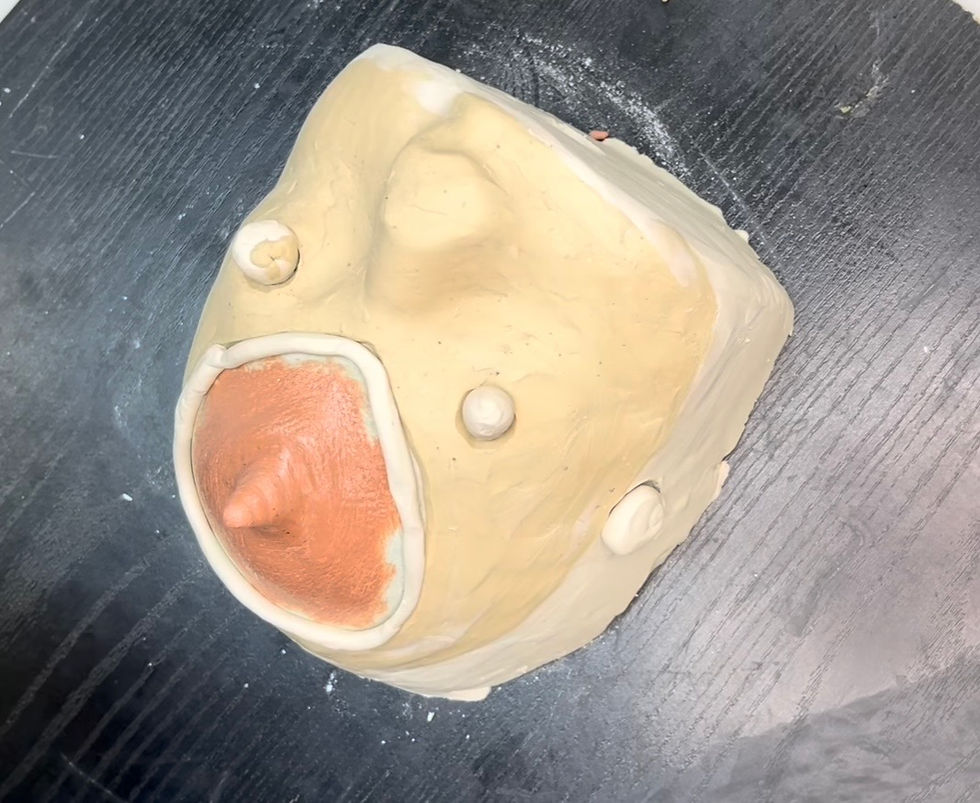
Keys - Then, you need "keys." These will be your registration marks when you close this mold. Without these keys, the mold will not fit well. Set a Round Nose Router Bit on a power drill. Then, at the slowest speed, drill a half-ball shape on the mold surface. You will need three keys. Clean the keys. On this mold, I could not put three keys due to the limited free space. I recycled an old face mold. You can see a patch near her right eye.

Round nose router bit for keys. Lacquer Thinner - Then, pour a small amount of lacquer thinner into a small cup. Use a Q-tip to clean the outside of the prosthetic clay sculpture. This will clean both extra clay and crystal clear from the last step. (Do not pass the edge of the sculpture. It will take away the skin texture you sculpted.)
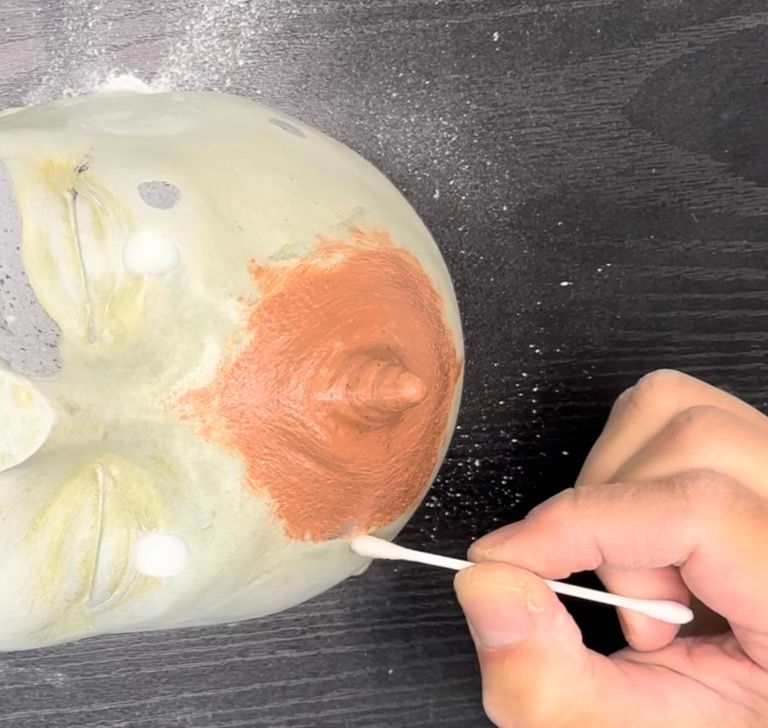
Clean the outside of the sculpture's edges.
Casing Mold
Kleen Clay - Now, the mold is ready for casing. You will need a pasta maker and Kleen Clay. I used Sculptex from Chavant in this video.

The pasta maker comes in handy. Take a small amount of Kleen Clay and insert it into the pasta maker. If you do not have a pasta maker, you can just flatten it by hand.
Create a strip of flattened Kleen Clay. Cut one side of the strip at a 45-degree angle.
Place the angled side next to the edge of the sculpture. Keep a distance of 1/8 inch. Continue this all around the sculpture. Do not cover the keys. These are called "Cutting Edge" and "Flashing." Cutting Edge will help the prosthetic have a very smooth blending edge, and Flashing will help the prosthetic material escape when the mold gets extra material.

Keep 1/8 inch away from the edge. Contacts - Since it is a big mold, I made open spots called "contacts." A positive mold touches a negative mold when it is closed. These contacts will support the positive mold and prevent it from rocking left and right in the negative mold.
Please do not place contacts on the undercut area. The mold will not open if you create undercut contacts.

Contacts on the side of a positive mold. Once all the areas are covered, make snake strips with Kleen Clay. Place them over the edge of the sculpture gently. Also, cover the keys and contacts with balls of Kleen Clay.
Cover keys and edges. WED Clay - This part is different from a waffle maker mold. I place a 1-inch-thick WED clay around the bottom of a positive mold. This will add a lip on a negative mold.

WED clay goes around the positive mold. Crystal Clear - Spray 1 layers of Crystal Clear. Let it dry. Do not use a hair dryer. It will soften your sculpture.
Dulling Spray - Spray 1 layer of Dulling Spray. Let it dry.
Lacquer Thinner - Remove the snake and balls. Clean the keys with lacquer thinner.
Sonite Wax - Paint Sonite Wax on the keys and contacts.


Molding
Pour a small amount of water into a bowl. (Paint Vaseline on the bottom of the bowl)
Ultracal 30 - Sprinkle Ultracal 30 into the water until the surface looks like a dried lake.

Dried lake look. Mix it with your hand. Ensure no chunks are left in the mixture.
Brush a thin layer of plaster on the positive mold.

Brush in all details. Wait 15-20 minutes, and check if it is dry but not completely cured.
Mix another batch of Ultracal 30 and splash it on the first layer. Do not touch the first layer. It is very fragile yet.

Splash it over the first layer. Once the first layer is covered, gently brush over the splashed layer and make it smooth. Wait for 10 - 15 minutes. Let it dry.
Mix a third batch of Ultracal 30 and splash it on the second layer.
Burlap - Dip small shapes of Burlap in the Ultracal 30. Place them on the mold gently.

3rd layer with burlap. As you add more layers, push bubbles out of each layer. Create 4-5 layers of them.
On the WED clay area, I beef it up with rolled burlap and plaster. This will make the mold lip stronger.

The lip area needs extra strength. After enough layers are added, I mix more plaster. This time, I make a dough with more Ultracal 30 powder in the water. Then, I add it to the mold using a metal plate. Smooth it out as you add it. Place a wooden board on top and make it flat.
Cover the mold with a plastic bag.

Flat on top.
Opening Mold
Wait for 2 - 3 hours. It gets hot, and it cools down.
Remove the plastic bag and place the mold upside down. Take WED Clay out. If it is still soft, you can reuse the WED Clay later.
Sand off sharp edges with a Shinto rasp or regular rasp.
Use 2x4 wooden pieces and make a bridge like the picture. This is why I made a lip on the negative mold.

2x4 bridge on negative mold lips. Then, place a C-clamp on the bridge and a metal bar on a positive mold. (You will need to insert a metal bar into a positive mold when you make it previously.) Twist the handle of the C-clamp and the mold opens slowly.

Slowly open the mold. Once it opens, use a wooden tool to take off clay from the mold. Do not use a metal tool to clean the mold surface. Keep the NSP Clay. This will tell you how much silicone you need next time.

Use only wooden tools. Clean the residue with lacquer thinner. Also, 99% alcohol works for cleaning.
After it is clean, brush on a furniture paste wax and buff it off. This will fill micro bubbles. Do this 2 times.
Put a positive mold and a negative mold together. Use a marker to draw registration marks on the mold. Tie them together with a mold strap for storage.

Since this mold is very fresh, you can use it for either silicone, foam latex, or gelatin. The next article is about pouring silicone. However, you can check these recipes for gelatin and foam latex.
Alright, you learned about bucket mold making. There are many ways of mold making, and stone mold is my favorite. It is very heavy, but it is like an art craft—very soothing and relaxing. If you would like to know about other mold materials, please check out this video.
Featured Items


DISCLAIMER: Links included on this page might be affiliate links. If you purchase a product with the links that I provide, I may receive a small commission. There is no additional charge to you! Thank you for supporting me so I can continue to provide you with FREE content each week!

Comments