
Recipe 16 : Foam Latex Makeup Application - Orc Makeup
- Koji Ohmura
- Dec 16, 2025
- 7 min read
Updated: Mar 16
I have done several kinds of Orc makeup in my career. The biggest one is from Blizzard's video game, Hearthstone, with the character from World of Warcraft. I was surprised by how much detailed story there is behind the Orc, Gul'dan. I discussed a lot with producers and Blizzard's creative team. It was so much fun to learn about it.
If you would like to learn how to make foam prosthetics, click the buttons below.

In this recipe, I explain how to apply my version of Orc with a foam latex prosthetic. If you want to learn how to make custom foam prosthetics, follow previous recipes on this link, Foam Latex Prosthetic Course.
Materials you need...
Foam Latex Appliance (Please check this link for recipes.)
Gelatin Ear (Please check this link for recipes.)
Latex Bald Cap
Bondo Transfer Scar (The recipes are coming in early 2026!)
Dentures (Please check this link for recipes.)
Lace Facial Hair
Kiehl's Blue Astringent Herbal Lotion
Barriere Cream
Beta Bond
Telesis 8 & Thinner
Pros Aide Cream
Pros Aide Bondo (Pros Aide and Cabosil Mix)
Witch Hazel
WM Creations Soft Sealer
RCMA No Color Powder
Powder Puff
PAX
Kryolan RMGP
99% Alcohol
Makeup Brushes
Chip Brush
W.M. Creations Stacolor Palette
PPI Skin Illustrator
Blue Marble
Ben Nye Ultimate F/X Palette
Spirit Gum
Pantyhose
got2b glued Hair Spray


Material links are here.
Lesson Video
Cheat Sheet
This is a quick cheat sheet I normally make for myself. I print it out and tape it on the makeup mirror and follow the steps. It helps me not to get lost while I am applying makeup.
1 | Kiehl's |
2 | Barriere Cream |
3 | Bald Cap (Beta Bond) |
4 | Powder |
5 | Gelatin Ears (Beta Bond) |
6 | Witch Hazel |
7 | Soft Sealer |
8 | Foam Latex Face (Telesis 8) |
9 | Bondo & Cream Pros Aide |
10 | Powder |
11 | PAX (Shibui) |
12 | RMGP Around Eyes |
13 | PAX (Green) |
14 | Pros Aide Transfer Scar |
15 | Ben Nye F/X Palette |
16 | Spattering |
17 | Denture |
18 | Spirit Gum & Hair |
19 | Blue Marble |
Skin Prep
Preparing a good canvas is very important for makeup. Without good preparation, makeup will be much harder. So let's not forget this step.
Kiehl's - The first step is Kiehl's Blue Astringent Herbal Lotion. This will remove excess oil from your skin and tighten it. This will make prosthetics stick better.
Barriere Cream - Barriere Cream goes over this. It will protect my skin. You can skip this if your skin is not sensitive.
Bald Cap
First, place a latex bald cap on your head. If you have long hair, tuck it inside the bald cap.
Bald Cap (Beta Bond) - Paint Beta Bond (or Pros-Aide) on your skin near the hairline. Use Q-tips to paint it on. If you want better bonding, paint it on both the bald cap and your skin. Let them dry before attaching them together.
Powder - Use a powder puff to put RCMA No Color Powder over the edges.

Bald Cap to cover my hair.
Gelatin Ear
Gelatin Ear (Beta Bond) - Now, it is the fun part. Have your gelatin ear prosthetic ready. Wipe off any mold release residue, if any. Then, paint BetaBond or Pros-Aide on the backside of the prosthetic. Also, do the same on your skin. Let them dry with cool air. Do not use a hair dryer. The gelatin prosthetic will melt.
When you glue them together, push it down to remove any bubbles.
Put powder on the edge with a powder puff.
Witch Hazel - When you see the thick edge, use Witch Hazel. Dip a Q-tip in Witch Hazel and tap it on the edge. It will melt the edge. Do NOT overpaint Witch Hazel. It might create harder edges.
Soft Sealer - Stipple W.M. Creations Soft Sealer over the gelatin prosthetic. It will make the surface stronger and paintable. Also, it will take off the powdery look.

If it is too heavy, you can use foam latex ears.
Foam Latex Orc Face
Since my prosthetic will go over my facial hair, I flatten it with Telesis 8.
After it dries, put powder on the glue.
Foam Latex Face (Telesis 8) - Wipe off any mold release residue from the foam latex piece. I use 99% alcohol for cleaning latex. Make sure the alcohol evaporates before putting it on the skin. Then, paint Telesis 8 on your skin. Even though Telesis 8 is stronger when it is applied on both skin and prosthetic, I prefer to paint it only on the skin. Foam latex sticks well anyway. Let it get sticky and place the prosthetic. If you cannot afford Telesis, you can use BetaBond or Pros-Aide. Telesis is easier to clean for removal.
Start with the center of your face. Then, glue more as it goes to the edge. I started from my upper nose, nose, cheeks, eyebrow areas, forehead, lower lip, and finished edges at the end.

Start from the center of the face. Bondo & Cream Pros Aide - If you see thick edges, use Pros-Aide Bondo (Pros Aide & Cabosil Mix) to fill the gaps. I used a metal spatula for this. Do not add too much at one time. It will not dry well if it is thick.
Then, stipple Cream Pros-Aide with a rough red sponge to add texture.
Powder - Put powder on after it dries.

Texturing on edges.


Painting
It is painting time! Basically, I am using the same color I used for pre-painting the foam latex piece. Please check Recipe 14 for pre-painting.
I start with PAX paint. You will need gloves and makeup sponges for this. Since PAX is colored Pros-Aide glue, you do not want sticky hands while you are painting.
First, I ripped a sponge and removed straight lines. Since PAX has very strong pigment in it, it can create harsh edges. By making random textures on the sponge, this issue will be solved.

Rough surface sponge will create random color textures. PAX (Shibui) - I painted Shibui PAX color first on the unpainted areas such as all edges, bald cap, and ears.
RMGP Around Eyes - I also used RMGP Shibui color on my eye areas since PAX is too hard to remove from these areas.
PAX (Green) - Then, the next color is thinned green PAX. I used water to thin this out and painted on the areas above. I continued this on my neck as well.

Don't forget your neck colored!


Pros Aide Transfer
Pros-Aide Transfer is made out of Pros-Aide. Fill silicone molds with Pros-Aide Bondo. Then, dry it until you can take it out of the mold. My Pros-Aide Transfer is encapsulated with Soft Sealer, so it can be handled without Transfer Paper. Please check this Pros Aide Prosthetic Course.
Pros Aide Transfer Scar - I use 99% alcohol on my skin. Then, just place the scar prosthetic. It will stick to the skin by itself. The edges will melt once they touch the alcohol, so you do not need to do edge work.

Detail Paint
Ben Nye F/X Palette - Ben Nye Ultimate F/X Palette is great for details. I painted a darker red color around the scar, my eye lines, and ears.
Spattering - Next, I used a Chip Brush for spattering. Trim the tip into an angle and dip it into an alcohol-based color such as PPI Skin Illustrator. Then, flick the tip with your finger to create a spattering effect. I used black color.

Blotchy color on purpose. Denture - I inserted the denture in my mouth. Since it is custom-made, it fits my teeth. The lower teeth are glued to my lower lip in order to create an underbite look. I painted some colors to make the denture look older and stained. Denture making video is this one.

Iconic tusk is very important for Orc makeup. I went back to my eye area to add more detail. I love coloring my waterline. It makes it look more natural. Sometimes, if the waterline is a human color, the character makeup cannot avoid the "prosthetics makeup on human" feeling.
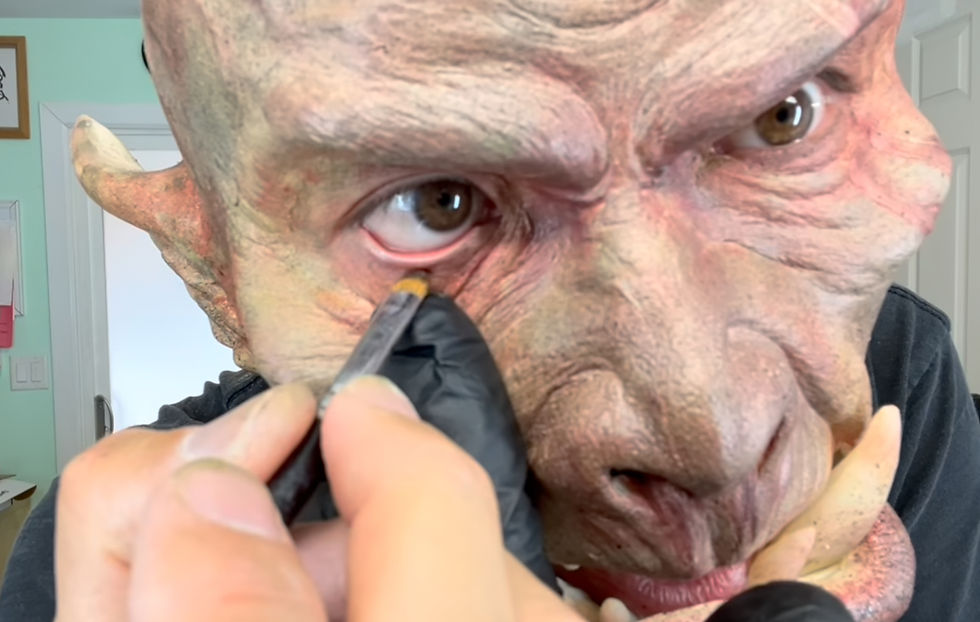
Coloring on waterline.
Facial Hair
Normally, I use custom-made lace hair. However, these are very expensive because each hair is sewn onto the lace one by one. If you cannot afford it, you can try making your own temporary hairpieces. I explained how to make them in this video.
Spirit Gum & Hair - I use Spirit Gum for facial hair application. I put a small amount of it on my skin and let it get sticky. Then, I lay the lace hair piece and press it down with a comb. After that, I use pantyhose to tap over the Spirit Gum. This will make its shine go away.
After gluing everything down, I use Got2BeGlue hair spray. I play with the hair while drying. This will make the hair look more rough. An orc doesn't need a runway model look!

Facial hair always makes creatures more wild and rough looking.
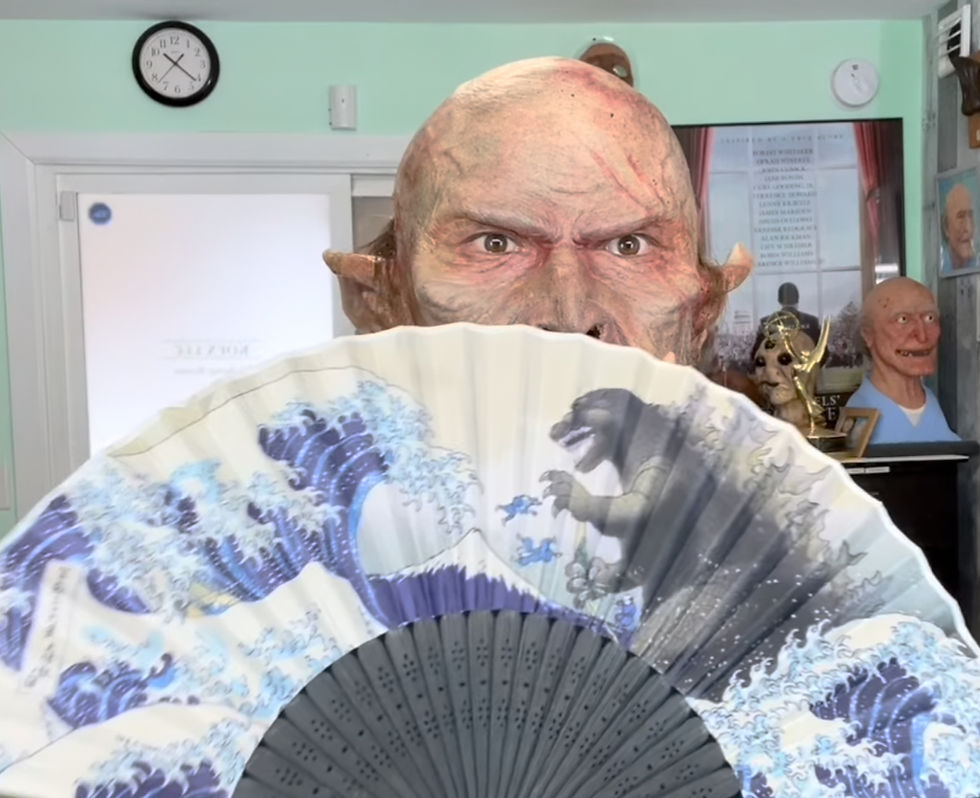
Blue Marble - That's it! I seal my makeup with Blue Marble Sealer. Then, I use my favorite Gojira fan to dry it. You can also add foam latex monster gloves if you want a scarier look. Or you can paint your own hands with some pointy nails. Imagination is unlimited! That is the fun part of magical/fantasy creatures. I have made many creatures over the last 20-something years, but the Orc is one of my favorites. If you try your own, please let me know how it goes in the comments below. Thank you so much for reading this long article!

Featured Items


DISCLAIMER: Links included on this page might be affiliate links. If you purchase a product with the links that I provide, I may receive a small commission. There is no additional charge to you! Thank you for supporting me so I can continue to provide you with FREE content each week!


Comments