
Recipe 25 : How to Make Silicone Mold
- Koji Ohmura
- Apr 13
- 4 min read
In Recipe 24, I explained how to design old-age prosthetics and transfer them to a flat board. Now what? Mold-making time! You can use this mold for both silicone prosthetics and Pros-Aide transfer prosthetics.

Materials you need...
Crystal Clear
Kleen Clay
Pasta Maker
Sculpting Tools
Hot Glue Gun
Wooden Sticks
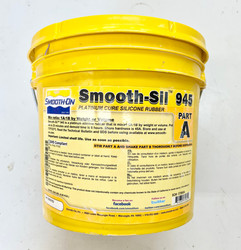
Platinum Cure Molding Silicone (Smooth Sil 945 or 940)
Evacuator
Non Latex Gloves
Chip Brush
Air hose
Knife
99% Alcohol
Material links are here.


Lesson Video
Flashing
Crystal Clear - You have beautiful sculptures from recipe 24. You do not want to destroy them during the molding process. I normally seal the sculptures with Crystal Clear first. This will protect the sculptures from minor scratches when you mold them, and it makes it easier to clean the mold later. This also helps Kleen Clay to stick on the board since baby powder from the sculpting process will prevent the clay from sticking.
Spray briefly all over the sculpture. Let it dry.

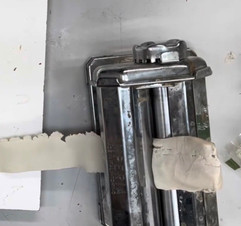
1 layer of Crystal Clear Kleen Clay - Next, you will need Kleen Clay. It is an oil-based, sulfur-free clay. I make it in a thin, even thickness. I always use a pasta maker for it.

The pasta maker comes in handy. Once you get a strip of Kleen Clay, trim both sides at a 45-degree angle. Place it around the sculpture, keeping 1/8 inch from the sculpture. This is called "flashing" and is made for silicone to escape while casting prosthetics.

45 degrees angle Spray another layer of Crystal Clear. Since this is a flat mold, you will not need to clean edges.

Flashing all around the sculptures.
Creating Dam Walls
Next step is making dam walls out of mixing sticks. I recommend wooden sticks. You can recycle after using them.
You can glue them with hot glue onto the board. Keep a little space from the flashing. Then, make sure there is no holes in between sticks and board. It should be no leakage.

Wooden sticks with hot glue.
Mixing Silicone
For mold silicone material, I used Smooth-Sil 945 from Smooth-On. (Or Smooth Sil 940) It is platinum cure silicone. You can use other molding silicone if you like. Please do NOT use tin cure silicone for this mold making if you like to try Silicone Prosthetics on this mold. If you know that you only make Pros-Aide transfers from this mold, tin-cure silicone is okay to use. Tin Cure silicone is normally cheaper than Platinum Cure silicone.

Mix well together. (Optional) If you have a vacuum chamber, it is a good idea to use it to get rid of microbubbles. When bubbles come out, the silicone mix rises up, so use a bigger bucket for this. I leave it in the chamber for 1 minute. Do not wear latex gloves, as latex will inhibit platinum silicone from curing. Vinyl gloves or nitrile gloves are recommended. If you do not have a vacuum chamber, pour the silicone from a high point slowly.

Silicone cups in a vacuum chamber.
Pouring Silicone
Ideally, pouring from one corner of the dam is the best way for an even, smooth flow. However, considering Smooth-Sil 945's pot life (working time before it gets thicker), which is 25 minutes, I pour it everywhere.

Pouring from a high point. Use an air compressor and air hose to pop bubbles. This will help the silicone to go into the textures of the sculpture.
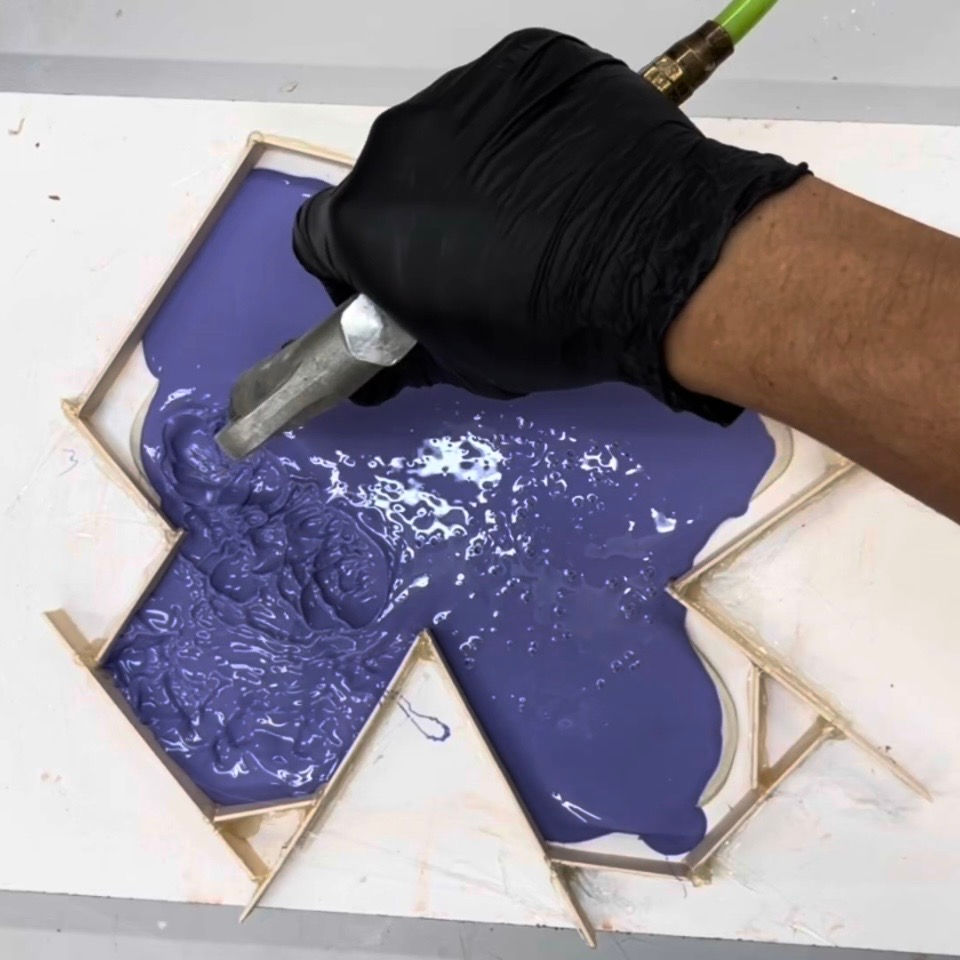
High air pressure will help silicone capture all details. Pour the rest of the silicone over the layer. Cover the entire sculpture and check that there is no leakage. Silicone will set up after 6 hours.
Opening Mold
After the silicone is completely cured, remove the dam walls. You can use them again in the future.
Slowly lift the silicone mold from the sculpture. Even though silicone is flexible, it is still breakable, so do not pull it out harshly. If the sculpture is still in good shape, you can make mold copies.
Trim the edge of the mold where it warps. Normally, it is near the dam walls.

Wash the mold with 99% alcohol. This will remove clay chunks and crystal clear spray.

Trim the edges and wash it with 99% alcohol.
The mold-making is done! You can fill this mold with either platinum silicone or Pros-Aide Bondo. For this mold, I used Pros-Aide in the next recipe. If you would like to try silicone, please click the button below.

Featured Items


DISCLAIMER: Links included on this page might be affiliate links. If you purchase a product with the links that I provide, I may receive a small commission. There is no additional charge to you! Thank you for supporting me so I can continue to provide you with FREE content each week!


Comments