
Recipe 26 : How to Make Pros Aide Prosthetics
- Koji Ohmura
- 5 days ago
- 4 min read
Since Pros-Aide prosthetic is made out of medical glue, it does not require makeup glue. This technique was developed in order to cut makeup application time dramatically. Some people call it Pros-Aide Transfer. Some artists call it Pros-Aide Material Prosthetic. Like me, I call it Bondo Prosthetic or Pros-Aide Prosthetic. Each artist has their own way of making it.

Materials you need...
Pros Aide
Flocking
Concentrated Water Color
Cabo Sil
Cup
Mask
Tongue Depressor
Gloves
Urethane Parfilm
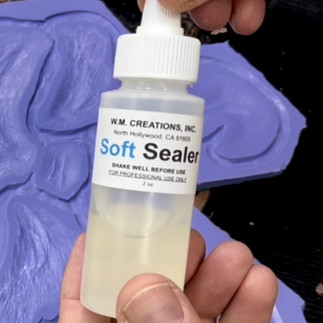
WM Creations Soft Sealer (or Super Baldiez)
Art Brush
99% Alcohol
Plastic Spatula
(Optional) Food Dehydrator
(Optional) Release Film
Baby Powder


Material links are here.
Lesson Video
Pros Aide Bondo
Pros-Aide Prosthetic is made out of Pros-Aide, literally. In order to get good details but also achieve smooth edges, you will need some thickness. You can either dehydrate it to make it thicker or add a thickener.
I add Cabo Sil into Pros-Aide. I add it until I get a peanut butter consistency.
When I mix them, I make sure to wear a mask and turn on a vent. If you inhale Cabo Sil, it hurts your lungs. Please make sure to have a proper environment.

Mix slowly. Once you get your favorite consistency, add color. Since Pros-Aide is water-based, add concentrated water color and flocking. I like to make it a little more reddish than regular skin tone. This will create an inner skin color.

Pink tone in the base.
Mold Prep
Pros Aide Bondo is very sticky when it dries. It even sticks on a silicone mold. I spray urethane parfilm. Let it sit for 30 minutes. Epoxy Parfilm works as well.

Urethane Parfilm
Plastic Skin
Majority of makeup artists are familiar with raw Pros-Aide Transfer with Release Film. However, I like to have some plastic skin on the prosthetic for better handling purposes. This Bondo prosthetic has plastic encapsulation. I learned this technique from Matthew W. Mungle and Michael Mosher. I am showing Michael Mosher's version in this recipe.
For the encapsulation, I use WM Creations Soft Sealer. It is an alcohol-based plastic skin in liquid form. I paint this in 2 layers on the textured area only, up to the prosthetic edges. Each layer needs to dry before the next step.
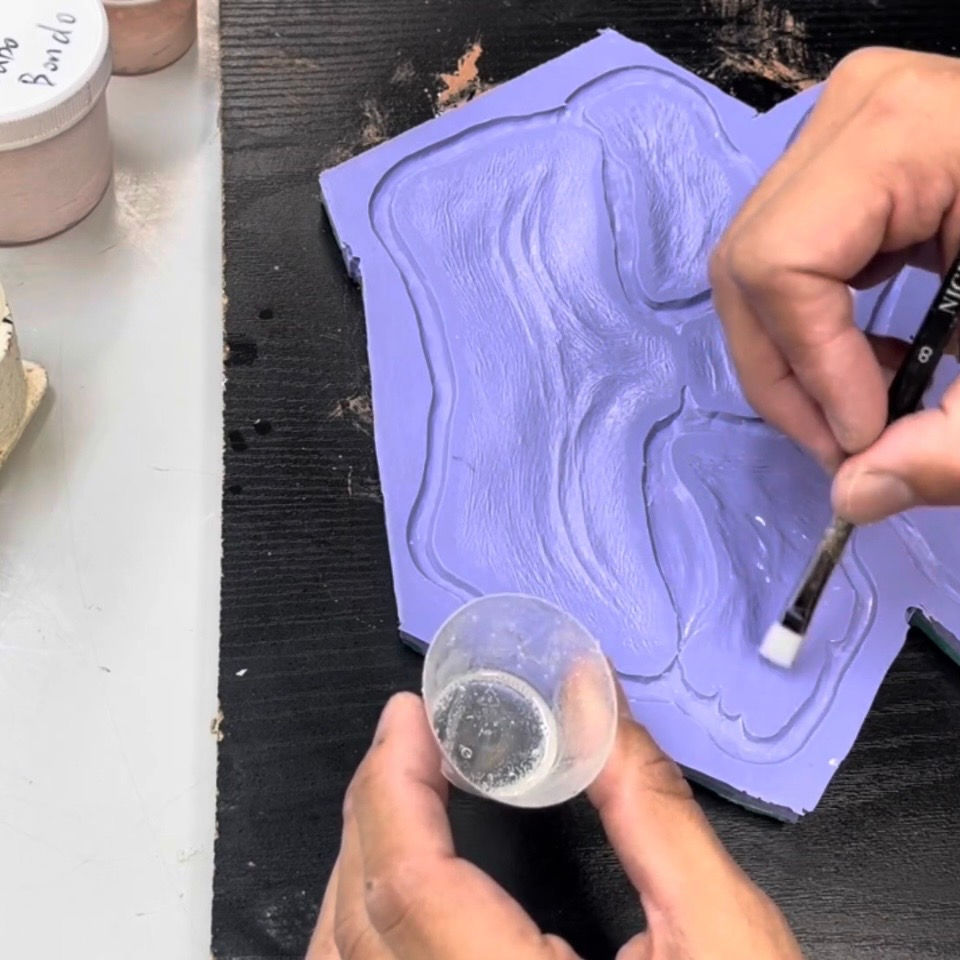
Keep the plastic skin within the edges.
Filling with Bondo
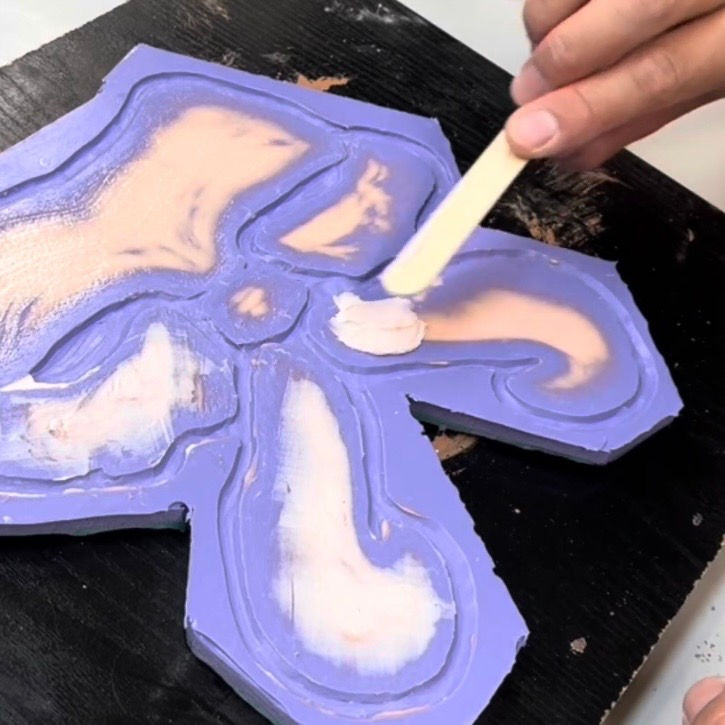
Once Soft Sealer layers dry, I start adding Bondo. I begin with filling the textures. Then, add more Bondo to fill entirely. Avoid creating bubbles.

No bubbles. Gently scrape the extra Bondo with a plastic spatula and push the residue to channel outside of the edges. Make sure there is no Bondo material on the edge.

Push the extra Bondo to the channel. When the sculpture is thin, Bondo tends to dry and become chunky. So finish this part before it happens.
If you find the Soft Sealer is peeling, tap it with a small amount of 99% alcohol.

Tap the peeled skin. It will melt and go back on the silicone mold. Let it sit for a couple of hours. Some artists put it in a freezer. However, Pros-Aide tends to get less tacky. It is better to use a dehydrator.

Dehydrator
If you see it shrink, add more layers of Bondo. If not, skip this part. (If you used dehydrated Bondo, it shrinks less.)
Encapsulation & Demold
Next day., most of the area is dried. Then, I paint 1 layer of Soft Sealer again. It does not need to be thick.

Encapsulate with Soft Sealer. After it dries, add Baby Powder on it.
Slowly lift it up from the corner by adding more powder. Since it is very soft, remove gently.

Slowly remove it with powder. If you do not like powdery look, you can wash it with water.

Application
This technique does not require release film or transfer paper. All you need is 99% alcohol. Spray or brush 99% alcohol on the skin and place the prosthetic on.
Soft Sealer will melt with alcohol, and the Bondo prosthetic will bond to the skin by itself once it dries.
I will show Old Age makeup with these Bondo Prosthetics in the next recipe. Stay tuned!

In memory of my mentor, Michael Mosher.
(Optional) How to Make Pros-Aide Transfer
Here is a quick recipe for how to make Pros-Aide Transfer in a different way.
Apply mold release on a silicone mold.
Fill the mold with Bondo (thick Pros-Aide).
Press down acetate sheet and squeeze out extra Bondo to the edge.
Freeze it in a freezer.
Remove it from the mold and remove edges.
Paint Pros-Aide on the surface.
Place transfer paper on the surface.
Remove the acetate sheet.
Place it on the skin.
Spray water or tap a wet sponge on the back of the paper.
Gently remove the paper.
Seal it with soft sealer.
Paint.
Featured Items


DISCLAIMER: Links included on this page might be affiliate links. If you purchase a product with the links that I provide, I may receive a small commission. There is no additional charge to you! Thank you for supporting me so I can continue to provide you with FREE content each week!


Comments