
Advanced Blood FX Makeup Application
Updated: Aug 20
Blood pumping is completely different from regular makeup and prosthetics. You will need a properly calculated and planned design, as well as the skills for well-timed blood pumping. This recipe is a combination of everything I taught in previous recipes.
If you would like to learn how to make props & blood tube click the buttons below.

Materials you need...
Kiehl's Blue Astringent Herbal Lotion
Telesis 8 & Thinner
Acetone
Lip Wand
Pros Aide Cream
Pros Aide Bondo (Pros Aide and Cabosil Mix)
Red Stipple Sponge
RCMA No Color Powder
Powder Puff
Reel Blue Aqua Sealer
EBA Skin Airbrush Ink
99% Alcohol
Makeup Brushes
W.M. Creations Stacolor Ink
PPI Illustrator
Airbrush & Compressor
EBA Pro Seal
Blue Marble
Injector
Fake Blood
Reference Book

My Makeup Station


Material links are here.
Lesson Video
Cheat Sheet
This is a quick cheat sheet I normally make for myself. I print it out and tape it on the makeup mirror and follow the steps. It helps me not to get lost while I am applying makeup.
1 | Kiehl's |
2 | Telesis 8 |
3 | Edger |
4 | Bondo |
5 | Cream Pros Aide & Powder |
6 | Aqua Sealer |
7 | EBA Endura Skin |
8 | Spatter Pink, Brown, Number 7 |
9 | Purple Vein & Mottle |
10 | Pro Seal |
11 | Blue Marble |
12 | Blood Tone |
13 | Prop Knife |
14 | Blood Set Up |
Skin Prep
Preparing a good canvas is very important for makeup. Without good preparation, makeup will be much harder. So let's not forget this step.
Kiehl's - The first step is Kiehl's Blue Astringent Herbal Lotion. This will remove excess oil from your skin and tighten it. This will make prosthetics stick better.
Apply Silicone Prosthetics
Now, let’s begin the fun part: prosthetics! Silicone prosthetics are very soft and hard to handle if the flashing is missing. So do not trim them when you apply.
Windex - Use Windex or 70% alcohol to wipe both sides of prosthetics. This will remove extra mold release residue. If the silicone has too much powder, spray water and submerge it in a water paddle, then gently wipe it off. The powder will come off easily. Do not rip off the edges.
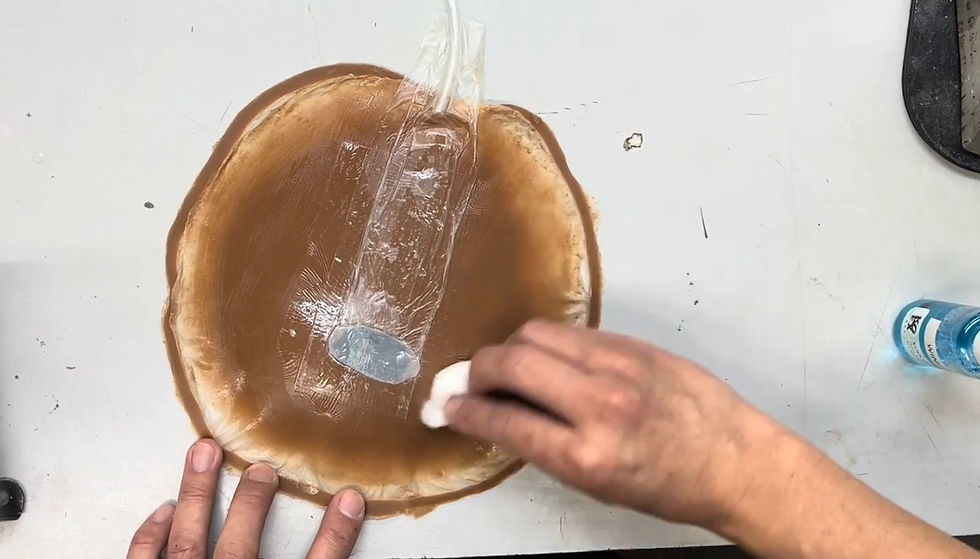
Cleaning a prosthetic with Windex. SilOne - Then, use Westmore SilcOne or any other silicone makeup glue such as Telesis 8 and Silabond. Apply it to both the skin and the back of the prosthetic. Start from the center and make it tacky. Since it is a big flat piece, I painted most areas except for near the edges. This can reduce the application time.

I painted glue on 80% of the surface. Put them together, and press down to remove any bubbles. Continue adding the glue to finish the edges. Near the wrist, make sure not to bend the wrist down or straight. Keep it slightly up as you attach. Secure the edge first, then place the arm straight. This process will avoid wrinkles on the wrist. It is similar to bald cap application on the back of the neck.

Gently place it down. 
Lift up the wrist a little higher to avoid wrinkles after straighten the arm. When you see the skin color through the silicone prosthetic edges, it means that it is glued. If it is still cloudy or liquid is moving inside, that means it is not dried enough or there is no glue at all. Use Glue Thinner to lift it up and glue it again.
Edger - Use a lip wand or a pointy Q-tip and dip it into "Edger" (Acetone). Take a small amount and gently tap the edges as you pull the flashing. You will see the plastic skin melting. Be mindful that acetone does not have a pleasant smell. Focus on touching the Baldiez edges only, not the skin.

Lip wand comes in handy.
Pros Aide Cream - Then, take Pros Aide Cream and stipple it with a red sponge. This will create skin texture on the edges.

Stippling Cream Bondo. Powder - After it dries, apply RCMA No Colour Powder.
Aqua Sealer - Stipple a small amount of Reels Aqua Sealer. This will get rid of the powdery look.

Aqua Sealer removes the powdery look.


Coloring
As you see, the prosthetic tone is completely different from my skin tone. I am using a stock piece from another project. That is why it is not tinted in my skin color. Sometimes, when you buy pieces from a store, they come in different tones. It is better to learn how to match colors.
EBA Endura Skin - I hazed EBA Endura Skin with an airbrush entirely. EBA Endura Skin is made for tattoo covers and is more flexible than other alcohol-based inks. You will not see much cracking after it dries. I am using EBA W3 & W4. These are my inner arm tones, which are without a suntan. (I will add a tanned look later.)

Spatter Pink, Brown, & Number 7 - Then, spatter pink color (WM Creations Pink 6205 & PPI Teak) to warm up my skin tone a little bit. This will also create a tanned look.
WM Creation Number 7 for blending colors. Since Number 7 has an olive tone in it, it will add some Asian skin tone. I diluted all of these colors. It is better to thin them out so they do not look like color is sitting on the skin, more like see-through.

Brown spatter. Open up the airbrush tip wide and decrease the air pressure. Tilt the airbrush down and press the trigger as you slightly increase the air pressure. This will create spattering.

Open up the tip and decrease the air pressure. Mottle - Since this effect is supposed to be after the knife was inserted, my skin should look irritated. I used a "mottle" effect by using diluted purple. As I spray, I move my hand left and right. Think of creating thunder or veins. Sometimes I go back to where I sprayed and add more depth to it. I also added a mottled look to my actual skin besides the prosthetic area.

Sealer
After I am satisfied with the look, I spray EBA Pro Seal. Pro Seal is alcohol-based. It will create a strong bond for the colors I applied previously.
I also add Blue Marble sealer after Pro Seal dries. Pro Seal is great; however, it creates shine and a sticky feeling. Blue Marble will tone it down.
Detail Hand Paint
Airbrush paint provides a quick and beautiful look. Let's add some details to it by hand painting.
I used PPI Effects Palette. It is alcohol-based color and comes with dried paint. You will need 99% alcohol to thin it down.
I used blood tone and dried blood tone. I painted on the cut area and prop knife.

Detail coloring on the cut.
Blood Set Up
I am using a corn syrup-based blood. (Please check out the recipe for fake blood.)
For blood tubing, I thin it out a little bit. When the blood is too thick, it will not come out smoothly. Also, you can add dish soap if it is not near the eyes or mouth. Soap will prevent the "bead up" look on silicone prosthetics. It also helps achieve a better washing result after makeup.
Connect an injector to the end of the tube and add blood to the injector. While doing this, make sure the injector's position is lower than the prosthetic. If it is higher than the prosthetic, gravity will cause the blood to come out as you pour blood into the injector.

Pour fake blood carefully. 
Close the injector. 
Insert the fake knife.
Show Time!
When it is ready, make sure the camera is rolling, the actor knows what to do, and you time the pumping blood well. If it goes well, there is no retake. If it doesn't (oh no!), use a non-alcohol wet wipe or towel to clean the blood before it dries, then try it again. The longer tube results in a longer reaction and requires more pressure.
Special Trick!! - If you want the blood to run exactly where you want, dip a makeup brush in water. Then, trace the line where you want the blood to go. Then, pump the blood. The blood will follow the water line.
For stronger pressure, use a pressure tank. After adding blood, insert air to add more pressure. Then, connect the tank to the tube. It is better to make a latex bladder instead of an Opsite bladder. Opsite is soft, so sometimes it bursts under strong pressure.


This is it! When you get a good result, you will know right away. Everyone around you will cheer after the camera stops rolling. While hearing the cheer and excitement, make sure to unhook the tube and stop the blood. Secure the path for the actor to walk out from the bloody mess without touching the blood. If you can have an assistant, have the assistant not handle the blood at all, so he/she can help the actor while you are cleaning the bloody mess. I experienced Bradley Cooper's monster movie "Midnight Meat Train" as a creature and walked over the lake of blood while we were having gallons of blood showered. It was fun!

Featured Items


DISCLAIMER: Links included on this page might be affiliate links. If you purchase a product with the links that I provide, I may receive a small commission. There is no additional charge to you! Thank you for supporting me so I can continue to provide you with FREE content each week!


Comments